Lists
Purpose
To create/ edit/ view custom field or lists to be added in templates
Steps:
Main view -> Click on  drop-down -> Select
  from the drop-down list

Create Lists
Steps:
Step 1: Click on  -> Select
  -> Click on
  option in “Custom Lists” window.
Step 2: Enter list [Name] and [Description] in the “Create a List” window.
“Advance Custom Field” option can be used to store details of list items/ values. By default, < Name> and < Code> of each item is recorded in the system. If you need to add other fields to store details of list, you can add them by using  button.
Step 3: Click on  button.
Edit Lists
Steps:
Step 1: Click on  -> Select
  -> Click on
  icon in “Custom Lists” window.
Step 2: Edit required details in “Edit a List” window.

Step 3: Click on  button to save changes. Click on
  button to exit.
Delete a List
Steps:
Step 1: Click on  -> Select
  -> Click on
  icon in “Custom Lists” window.
Step 2: Click on “Yes” button to confirm the deletion in “Attention” pop-up window or click on “No” to deny the deletion.

View List Information
Steps:
Step 1: Click on  -> Select
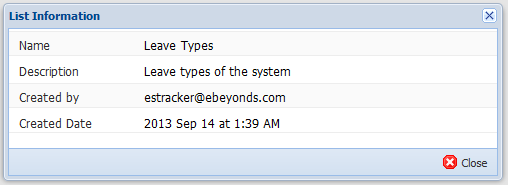
Step 2: Click on  icon in “Custom Lists” window to open “List Information” screen

Add Items to Lists
Steps:
Step 1: Click on  -> Select
Step 2: Select the custom list you need to add item.
Step 3: Click on  option.
Step 4: Enter new item details in “Add a Item” window.

Step 5: Click on  to save the item to list and add another new item. If not, click on
  button to save the item to list and close “Add a Item” window.
Edit Items of Lists
Steps:
Step 1: Click on  -> Select
Step 2: Select the custom list & item you wish to edit.
Step 3: Click on “Edit Item”  icon in the action column
Step 4: Edit item details in “Edit an Item” window.
Step 5: Click on  button to save the modifications.
Delete Items of Lists
Steps:
Step 1: Click on  -> Select
Step 2: Select the custom list & item you wish to delete.
Step 3: Click on “Delete Item”  icon in the action column
Step 4: Click on “Yes” button to confirm the deletion in “Attention” pop-up box OR click “No” to deny action.

