Users
Purpose
To perform all functions related to the management of users in the system.
Steps:
Main view -> Click on  drop-down -> Select
  from the drop-down list
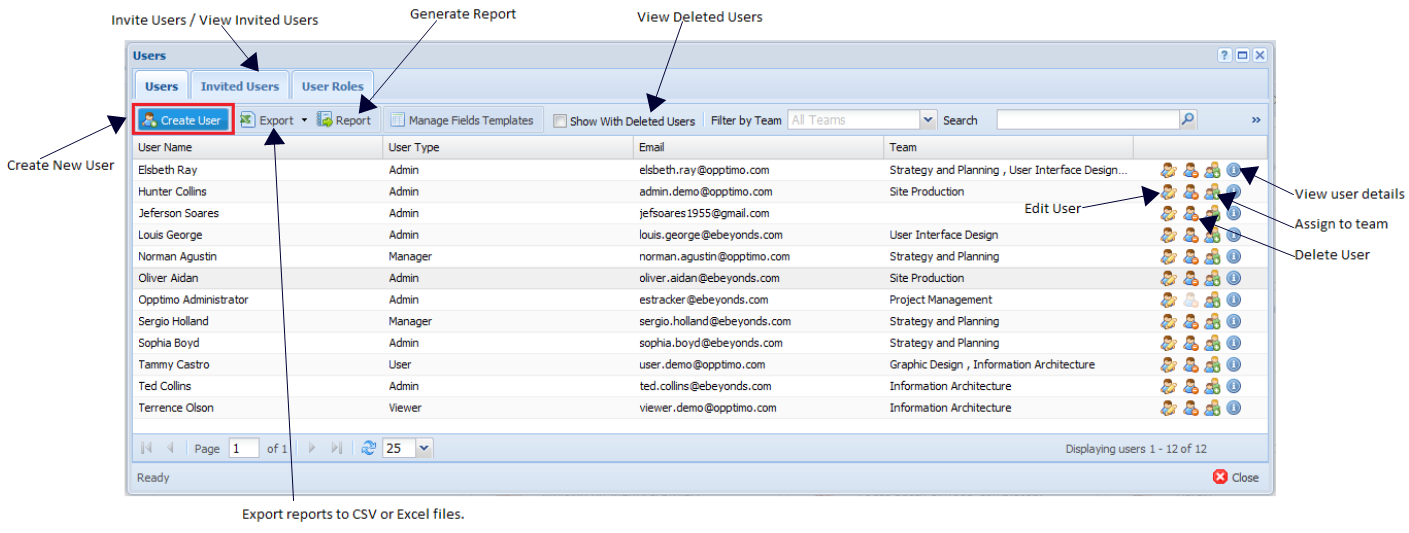
Create New User
Purpose
This option provides the facility of adding a new user to the system. There are two ways to add users;
(1) Create User
Steps:
Step 1: Click on -> Select -> Select  in toolbar.
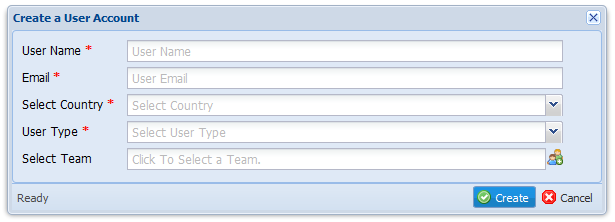
Step 2: Fill the necessary details in the below “Create a User Account” screen.
Note:
There are five different user types’ displays under “User Type” drop-down list. These user types provide users different types of permission in the application.
Viewer
- Edit User Profile
- Show People and Information
- Show Schedules of Users
User
This type includes all permission given for the “Viewer” user type and below mentioned permissions.
- Enable Dashboard
- Add New Status to Back Dates
- Add New Status
- Request Leaves
- Manage To Do's And Notes
Manager
This type includes all permission given for the “User” user type and below mentioned permissions.
- Administrator Features
- Manage Teams
- Manage Users
- Manage Projects
- Manage Tasks
- Manage Schedule of Users
- Manage Export Feature
- Manage Leaves of Users
- Mange User Task
Finance
This type includes all permission given for the “User” user type and below mentioned permissions.
- Administrator Features
- Mark Projects Invoiceable
- View Invoiced Projects
- View ALL Projects Summary
- Using Billing Module
- Manage Projects
- Manage Export Feature
Admin
This type includes all permission given for the “Manager” user type and below mentioned permissions.
- Manage Lists
- Using Billing Module
- Manage Holidays
- Supper permission to approved self leaves
- Mark Projects Invoiceable
- Mark Billable Projects
- View Invoiced Projects
- View ALL Projects Summary
- Manage Job fields templates
- Manage Country
- Change User Type
- Manage Job fields templates
Step 3: Click on  button. This will send an email to added user to confirm the registration.
(2) Invite User
Invite Individual User
Steps:
Step 1: Click on -> Select -> Select  in toolbar.
Step 2: From the dropdown menu, select  button.
Step 3: Fill the necessary details in the below “Invite User” screen.
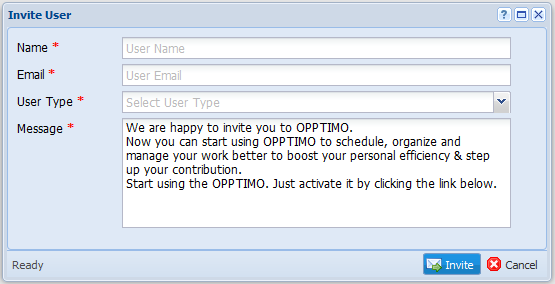
Step 4: Click on  button. This will send an invitation email to invited user to register with the system.
Invite Multiple Users
Purpose
This option provides a user to invite a group of people with a one permission level.
Steps:
Step 1: Click on -> Select -> Select in toolbar.
Step 2: From the dropdown menu, select  button.
Step 3: Fill the necessary details in the below “Invite Multiple Users” screen.
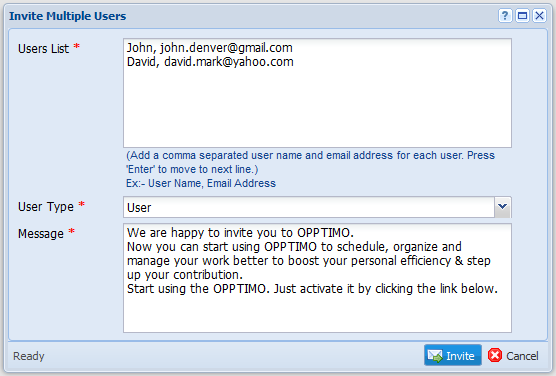
Step 4: Click on button. This will send an invitation email to invited user to register with the system.
Note:
You can go to  panel and follow the above same steps to invite multiple users as well.
View All Invited Users
To view all invited users, click on -> Select -> Select  tab
tab
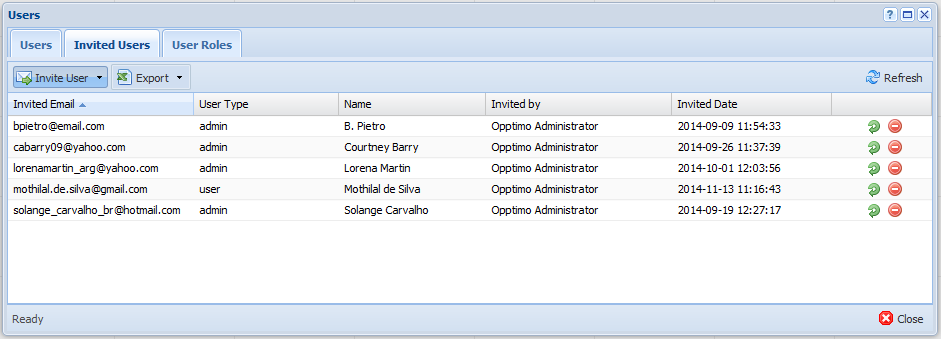
Re-Invite Users
Steps:
Step 1: Click on -> Select -> Select -> Click on  icon of the user you wish to re-invite.
Step 2: Click on “Yes” button to confirm the re-invitation on pop-up box. This will send a re-invitation email to the user to register with the application.
Delete Invitation
Steps:
Step 1: Click on -> Select -> Select -> Click on  icon in the invited user window.
Step 2: Click on “Yes” button to delete the invitation on pop-up box.
Edit User
Steps:
Step 1: Click on -> Select -> Select  icon in the user window that you wish to edit.
Step 2: Update the user details in the below “Edit User” window.
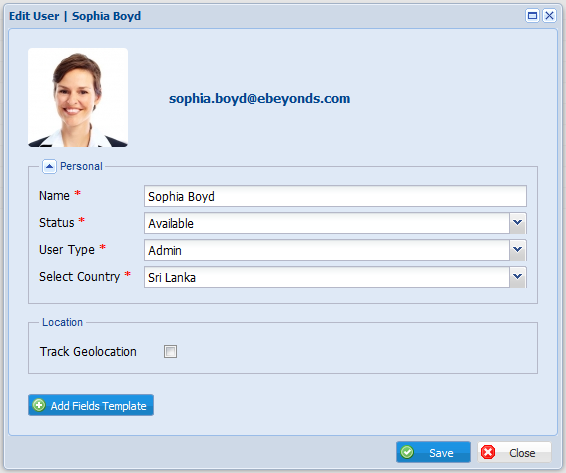
Step 3: Click on  button.
Delete Users
Steps:
Step 1: Click on -> Select -> Select  icon in the user window that you wish to delete.
Step 2: Click on “Yes” button in confirm pop-up box.
This will block the user and avoid access to the application, but do not delete the user permanently. If you need to view deleted users, use  option.
Note:
Logged-in user cannot delete own user account. Therefore, option is disabled in front of logged in user name.
Assign Users to Teams
Steps:
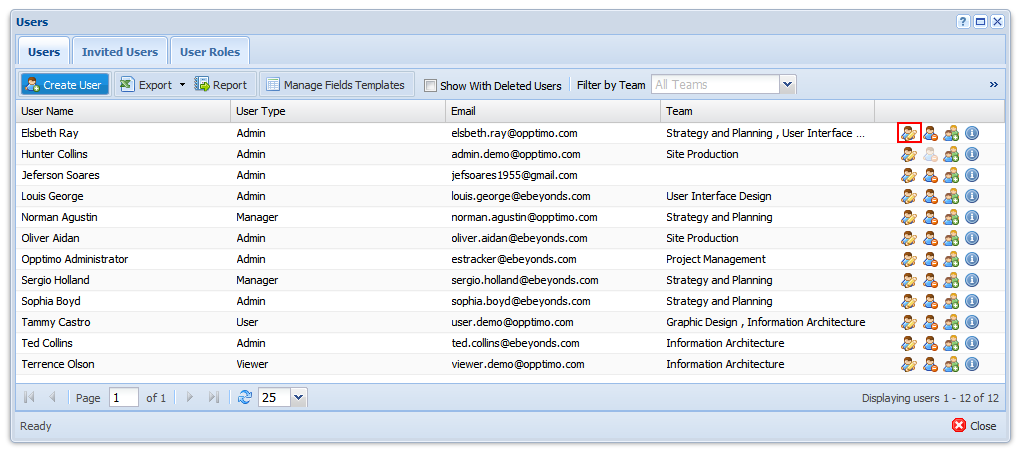
Step 1: Click on -> Select -> Select  icon in the user window.
Step 2: Select the team you wish to assign the user from below “Assign to Teams” window.
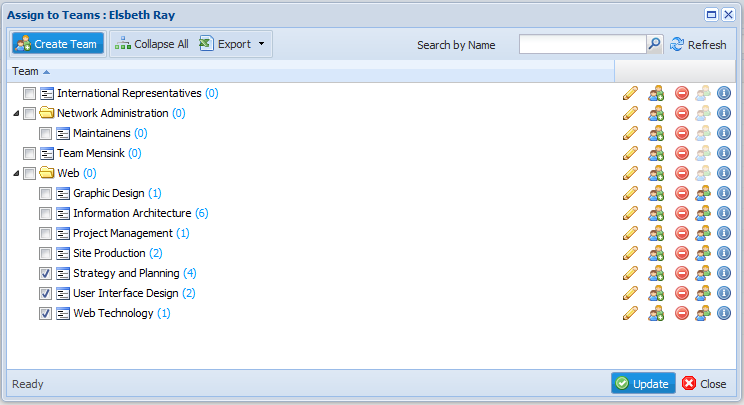
Step 3: Click on  button to save the record to the system.
Note:
“Assign to Teams” window provide the facility to create teams / edit teams & delete teams as well.
Field Template Support for User Details
Purpose
By managing user template fields, users can include specific field templates matching to each and every user. This option is available only for “Admin” type users of the system.
Step 1: Click on -> Select -> Click on edit users button.
Step 2: Click on  In “Edit Users” window.
Step 3: Select a “Field Template” and click  button.
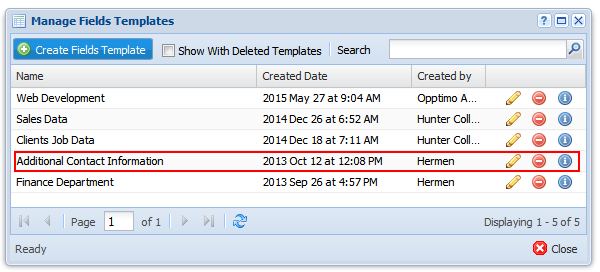
Refer Fields Templates section in the Help Guide for step by step guide to create custom field templates.
View Deleted Users
Steps:
Step 1: Click on -> Select
Step 2: Click on  option in toolbar. This will show the all users in the system including deleted users.
Other User Detail View Restriction According to Permission
Purpose
With permission levels and requirements, OPPTIMO user detail views can be restricted.
There are three main permission level.
Default View – Users can view other user details, currently working jobs etc.
User Detail Restricted to Team – Users only can view details of their team members what they are currently working on etc.
User Detail Restricted only for the User – Users only can view their own details.